This post describes set up of a Perforce HelixCore server for a game studio using the Unreal Engine.
Portions of this post may drip with enthusiasm for one or more services. I can’t help that marketing practices have coopted all forms of sincere speech, and now anyone with something positive to say sounds like a pathetic shill. None of it is an endorsement.
0. Intro
With Unreal Engine, I prefer Perforce for source control—its integration with the UE editor is best in class; it’s the system used at Epic, and Unreal Game Sync currently requires it. Managed SaaS offerings are convenient and robust, but costly, so I prefer to run and manage deployments myself. That said, it’s not the simplest thing. I’ve set up dozens of Perforce servers, local machines, intranet and internet servers, VMs, Docker containers, and across multiple OSes—Linux, Windows, and Mac. I’m sure I do it wrong, because I don’t actually like doing it. But a) hate recurring costs, and b) I will never develop software without source control because that’s dumb.
My process goes something like:
- Plan deployment
- Set up environment
- Install application
- Basic configuration
- Set up a typemap
- Connect with P4Admin
- Add a Standard User
- Create a Stream Depot
- Connect with P4V, Create Stream and Workspace
- Readme.md
- Set up .p4ignore
- Take Nap
1. Plan Deployment
Have considered:
- Personal machine—hardware is cheap, IT is hard, scaling is hard
- *Virtual private server—costs scale with needs, IT is hard, redundancy & security is easier
- Virtual machine—at home or datacenter, IT is even more complex, migration/scaling is easier
- **Docker container—migration is even easier, IT is batshit
- Managed cloud services—hands-off system administration is easy peasy, pricey AF
*the option I am picking
**if I fully grokked Docker, I’d do this; I’ve run it before, but it remains one extra layer of comfort that I don’t want to manage during crisis
One of the best deals in low-end hosting of Virtual Private Servers I found was Hostinger. A Tier 2 VPS runs $7/month for two years, renewing at $11/mo. Automated backups and easy snapshotting take care of elementary disaster preparedness.
2. Set Up Environment
After some prototyping—a little trial and error—I found Ubuntu 22.04 setup to be the most straightforward. Package management, configuration, and patching experiences succeeded without error or workaround.
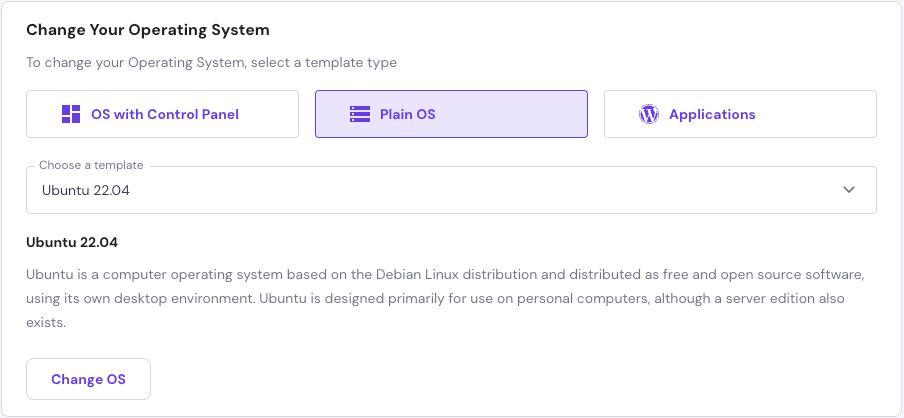
Keep in mind, this approach is lazy! I first create the server using password-only authentication. After everything is set up and working, I go back to enable SSH key auth. It’s not the most secure approach, but I don’t like generating keys until I know I only have to do it once.
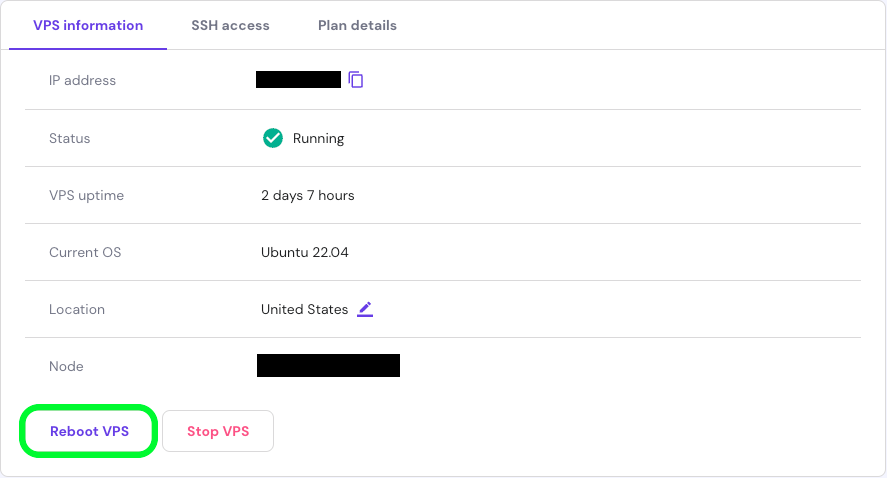
root@basicserver:~# apt update && apt upgrade -yThis will do the first pass of updating, upgrading, and service restarting. When completed, I exit the SSH session. Using the Hostinger web-based server control panel, I restart the server. It’s arguably unnecessary, but a nice sanity check that I haven’t already screwed something up and the machine will boot.
3. Install Application
Once I’m reconnected to the server, I begin the Perforce installation.
root@basicserver:~# wget -qO - https://package.perforce.com/perforce.pubkey | sudo gpg --dearmor -o /usr/share/keyrings/perforce-archive-keyring.gpgThat’ll finish silently. Then:
root@basicserver:~# echo "deb [signed-by=/usr/share/keyrings/perforce-archive-keyring.gpg] http://package.perforce.com/apt/ubuntu $(lsb_release -c -s) release" | sudo tee /etc/apt/sources.list.d/perforce.listdeb [signed-by=/usr/share/keyrings/perforce-archive-keyring.gpg] http://package.perforce.com/apt/ubuntu jammy releaseLooks good.
root@basicserver:~# sudo apt updatePackages will be fetched, package lists read, a dependency tree built, and state information read. Lastly, I see:
2 packages can be upgraded. Run 'apt list --upgradable' to see them.I’ll get to that, but first, Perforce.
root@basicserver:~# sudo apt-get install helix-p4dMore package work as apt gets and installs Perforce HelixCore. But, before it continues, I’m asked:
After this operation, 32.3 MB of additional disk space will be used.Do you want to continue? [Y/n] YIt concludes with the following message:
Running kernel seems to be up-to-date.
No services need to be restarted.
No containers need to be restarted.
No user sessions are running outdated binaries.
No VM guests are running outdated hypervisor (qemu) binaries on this host.
Now I check for those upgradeable packages mentioned before:
root@basicserver:~# apt list --upgradeableListing... Done
python3-update-manager/jammy-updates 1:22.04.20 all [upgradable from: 1:22.04.19]
update-manager-core/jammy-updates 1:22.04.20 all [upgradable from: 1:22.04.19]Still just the two, so I upgrade the one with a dependency, and both are upgraded.
root@basicserver:~# apt upgrade update-manager-coreOnce again I am warned:
After this operation, 0 B of additional disk space will be used.And confirm:
Do you want to continue? [Y/n] YThis ends with:
No services need to be restarted.
No containers need to be restarted.
No user sessions are running outdated binaries.
No VM guests are running outdated hypervisor (qemu) binaries on this host.
4. Basic Configuration
Now I’ll run the initial configuration script.
root@basicserver:~# sudo /opt/perforce/sbin/configure-helix-p4d.shYou have entered interactive configuration for p4d. This script
will ask a series of questions, and use your answers to configure p4d
for first time use. Options passed in from the command line or
automatically discovered in the environment are presented as defaults.
You may press enter to accept them, or enter an alternative.
Please provide the following details about your desired Perforce environment:Perforce Service name [master]: myperforceService myperforce not found. Creating...Perforce Server root (P4ROOT) [/opt/perforce/servers/myperforce]:
Create directory? (y/n) [y]: y
Perforce Server unicode-mode (y/n) [n]: y
Perforce Server case-sensitive (y/n) [y]: n
Perforce Server address (P4PORT) [ssl:1666]: ssl:1666
Perforce super-user login [super]: superdork
Perforce super-user password:
Re-enter password.
Perforce super-user password: Configuring p4d service 'myperforce' with the information you specified...
Perforce db files in '/opt/perforce/servers/myperforce/root' will be created if missing...
Server switched to Unicode mode.
Started 'myperforce' p4d service.
Started 1 services.
Establish trust relationship with SSL-enabled server...
The fingerprint of the server of your P4PORT setting
'ssl:1666' (127.0.0.1:1666) is not known.
That fingerprint is ##:##:##:##:##:##:##:##:##:##:##:##:##:##:##:##:##:##:##:##
Added trust for P4PORT 'ssl:1666' (127.0.0.1:1666)
Creating super-user account...
User superdork not changed.
Initializing protections table...
Protections saved.
Setting security level to 3 (high)...
Counter security set.
Setting password...
Creating ticket for root user5. Set Up a Typemap
A typemap is a set of rules to help Perforce know how best to handle a given type of file. It tells perforce how to store and lock files based on their filename extensions. The following command will effectively open the typemap in the system’s text editor and, upon saving, update configuration.
root@basicserver:~# p4 -P [superuser password] typemapThis command will open the typemap file in VIM if the OS is Ubuntu. Press [i] to enter “insert” mode to begin editing. The following example typemap merges suggestions from Epic with the default created by Perforce, or I could copy another, such as John Scotts’ (GitHub).
# The form data below was edited by perforceboss
# Perforce File Type Mapping Specifications.
#
#  TypeMap:	a list of filetype mappings; one per line.
#		Each line has two elements:
#
#  		Filetype: The filetype to use on 'p4 add'.
#
#  		Path:     File pattern which will use this filetype.
#
# See 'p4 help typemap' for more information.

TypeMap:
	binary+w //....exe
	binary+w //....dll
	binary+w //....lib
	binary+w //....app
	binary+w //....dylib
	binary+w //....stub
	binary+w //....ipa
	text //....asp
	text //....cnf
	text //....css
	text //....htm
	text //....html
	text //....inc
	text //....js
	text //....config
	text //....cpp
	text //....h
	text //....c
	text //....cs
	text //....m
	text //....py
	text+w //....log
	text+w //....ini
	text+w //....pdm
	binary+Fl //....zip
	binary+Fl //....bz2
	binary+Fl //....rar
	binary+Fl //....gz
	binary+Fl //....avi
	binary+Fl //....jpg
	binary+Fl //....jpeg
	binary+Fl //....mpg
	binary+Fl //....gif
	binary+Fl //....tif
	binary+Fl //....mov
	binary+Fl //....jar
	binary+l //....ico
	binary+l //....exp
	binary+l //....btr
	binary+l //....bmp
	binary+l //....doc
	binary+l //....dot
	binary+l //....xls
	binary+l //....ppt
	binary+l //....pdf
	binary+l //....tar
	binary+l //....exe
	binary+l //....dll
	binary+l //....lib
	binary+l //....bin
	binary+l //....class
	binary+l //....war
	binary+l //....ear
	binary+l //....so
	binary+l //....rpt
	binary+l //....cfm
	binary+l //....ma
	binary+l //....mb
	binary+l //....pac
	binary+l //....m4a
	binary+l //....mp4
	binary+l //....aac
	binary+l //....wma
	binary+l //....docx
	binary+l //....pptx
	binary+l //....xlsx
	binary+l //....png
	binary+l //....raw
	binary+l //....odt
	binary+l //....ods
	binary+l //....odg
	binary+l //....odp
	binary+l //....otg
	binary+l //....ots
	binary+l //....ott
	binary+l //....psd
	binary+l //....sxw
	binary+l //....uasset
	binary+l //....umap
	binary+l //....upk
	binary+l //....udk
	binary+l //....ubulk
	binary+Sw //....pdb
ESC returns VIM to Command Mode.
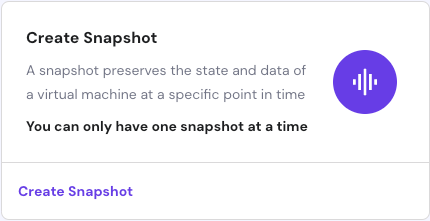
:wqVIM saves (write) and exits (quit). Then I do one more probably unnecessary server restart, and create the server’s first snapshot to capture this moment, before I potential mess something up.
6. Connect With P4Admin
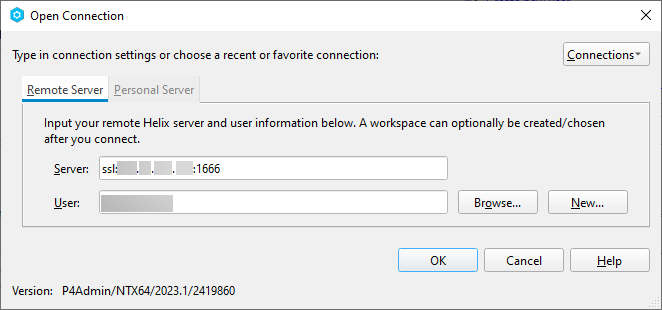
On my client machine, I have P4V and P4Admin installed. I launch P4Admin to test the connection and continue configuration. Add the IP address of your server (“ssl:###.###.###.###:1666”), and the name of your Perforce superuser, you’ll be prompted for the password during the connection attempt.
7. Add Standard User
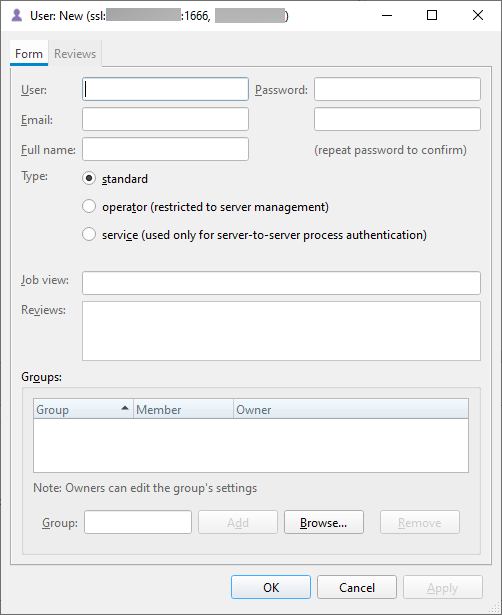
I don’t work in Perforce with the superuser account, instead creating a new standard user for myself to work from. Select the Users & Groups tab and Ctrl+N, or R-click in the user list and select New User… or click the Add User button in the button bar (so many choices!).
8. Create a Stream Depot
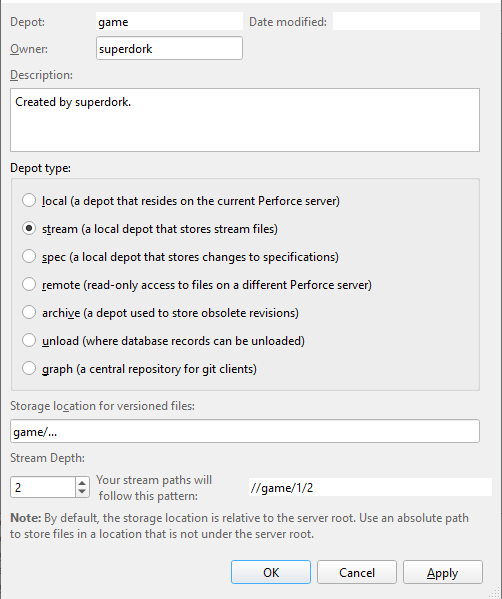
With the Depots tab selected, Ctrl+N to create a new depot.
- Depot name according to game
- Depot type: stream
- Stream Depth: 2
A stream depth of 2 allows for a straightforward [Category] / [Name] branch organization. Any higher and it’s Annoying City.
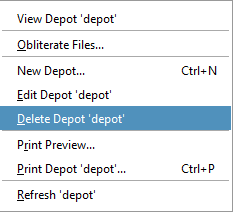
Then, in the Depots tab, for clarity’s sake, I delete the default depot through the right click menu.
9. Connect with P4V, Create Stream and Workspace
Launch P4V and connect to the server with your standard user account, and without specifying a workspace. Then use View > Streams to open the Streams tab, and create a new stream with Ctrl+N, or r-click menu and select New Stream.
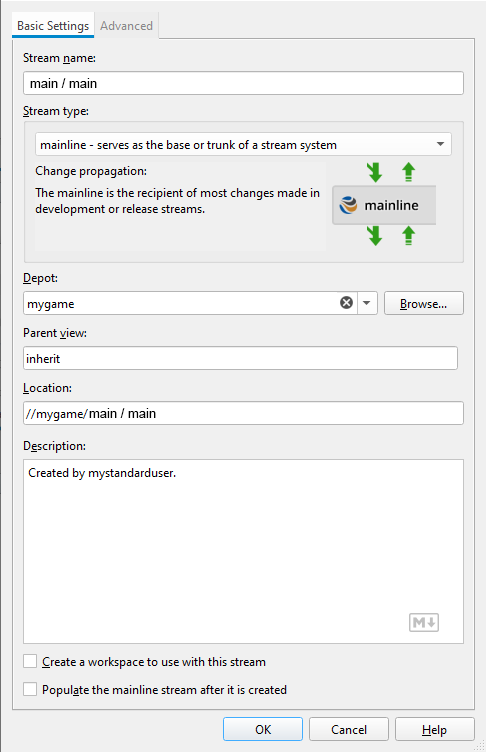
- Stream name: main/main
- Stream type: mainline
- Uncheck ” Create a workspace to use with this stream”
- Uncheck “Populate the mainline stream after it is created”
- Click [OK]
Now I get a workspace created.
- In the Streams list, I right-click on “main/main” and select New Workspace…
- Select the stream (main/main) and right-click, New Workspace…
- Workspace name something like “username_descriptive”
- Workspace root I point at a directory on a large “data” drive where I keep a general “Depot” parent directory
- Leave Switch to new workspace immediately
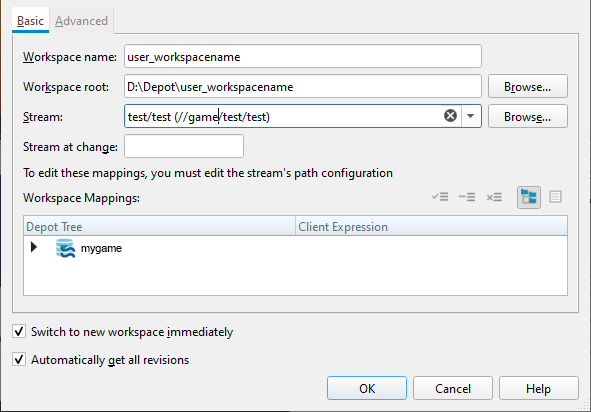
On my local machine I make a starter readme.md and save it in the workspace root folder (d:\Depots\user_workspacename\).
Perforce Streams: Everything You Need to Know (YouTube)
Perforce Helix Core Beginner’s Guide: How to Create a Workspace (YouTube)
10. readme.md
On my local machine I make a starter readme.md and save it in the workspace root folder (d:\Depots\user_workspacename\). Then, back in P4V, refresh the workspace view and find the file, select and add to add it to a new changelist, and submit it right away.
11. Set up .p4ignore
Once I have successfully submitted a readme, things are looking good. So my next and last step in this initial setup is getting a .p4ignore working. This one is copied from Matt Marcin’s (GitHub).
Saved/
LocalBuilds/
*.csproj.*
.vs/*
*.pdb
*.suo
*.opensdf
*.sdf
*.tmp
*.mdb
*/obj/*
*.vcxproj
*.sln
*-Debug.*
/FileOpenOrder/
*.xcworkspace
*.xcodeproj
./Makefile
./CMakeLists.txt
.ue4dependencies
Samples/*
FeaturePacks/*
Engine/Documentation/*
.git/*
*.csprojAssemblyReference.cache

#Linux Debug Files
*.sym
*.debug

# Engine intermediates
Engine/Intermediate/*
Intermediate/*

# Intermediate folders for programs should not be checked in
Engine\Programs\*\Intermediate\*

# Intermediate folders created for various C# programs
Engine\Source\Programs\*\obj\*

# Saved folders for programs should not be checked in
Engine\Programs\*\Saved\*
Engine\Programs\UnrealBuildTool\*

# Derived data cache should never be checked in
Engine/DerivedDataCache/*

# Ignore any build receipts
Engine/Build/Receipts/*

# Ignore personal workspace vars
p4config.txt

# Ignore Unix backup files
*~

# Ignore Mac desktop services store files
.DS_Store

# Ignore crash reports
crashinfo--*

# Ignore linux project files.
*.user
*.pro
*.pri
*.kdev4

# Obj-C/Swift specific
*.hmap
*.ipa
*.dSYM.zip
*.dSYM

# Ignore documentation generated for C# tools
Engine/Binaries/DotNET/UnrealBuildTool.xml
Engine/Binaries/DotNET/AutomationScripts/BuildGraph.Automation.xml

# Ignore version files in the Engine/Binaries directory created by UBT
/Engine/Binaries/**/*.version

# Ignore exp files in the the Engine/Binaries directory as they aren't C/C++ source files
/Engine/Binaries/**/*.exp

# Ignore Swarm local save files
Engine/Binaries/DotNET/SwarmAgent.DeveloperOptions.xml
Engine/Binaries/DotNET/SwarmAgent.Options.xml

# Intermediary Files
*.target.xml
*.exe.config
*.exe.manifest

# Ignore project-specific files
GAMEPROJECT/Build/Receipts/*
GAMEPROJECT/DerivedDataCache/*
GAMEPROJECT/Binaries/*-Shipping.*
GAMEPROJECT/Intermediate/*
I save this as a “.p4ignore” next to the readme. Let’s say D:\Depots\user_gameworkspace\. Then I set P4 to look for ignore files.
D:\Depots\game_workspace> p4 set P4IGNORE=.p4ignoreThen I check to see…
D:\Depots\game_workspace> p4 ignores -vIf it works (returning a list of ignored files) I mark the .p4ignore for add, and then submit.
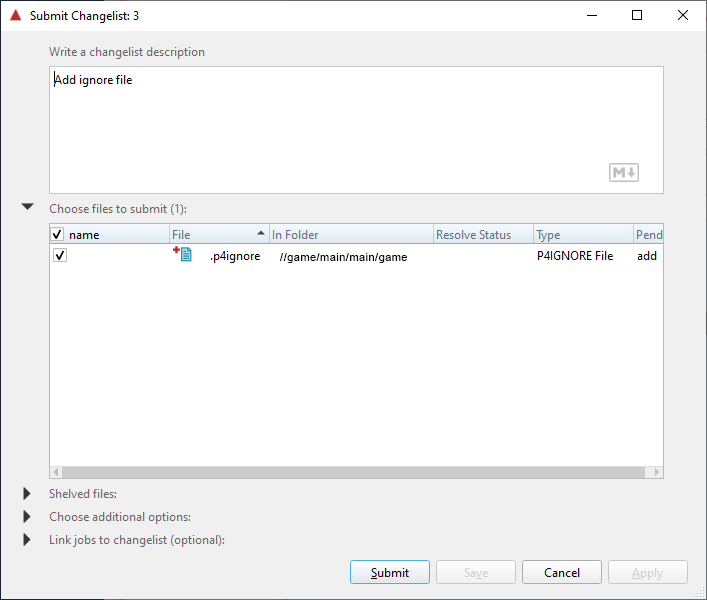
If you need to know more about ignores: How to Ignore Files and Directories in Perforce Helix Core (YouTube)
12. Take Nap
At this point, my brain is ready for a break. I create another server snapshot before taking a nap. When I come back, I’ll set up a standard Linux user account, set the server up SSH key authentication, and start clamping down the firewall.
Let me know what I messed up!
—Isaac


Comments
One response to “Setting Up Perforce for Unreal”
[…] Setting up a Perforce Server for Unreal […]